Today we will have a look at the best podcast hosting services recommended by Podcasters. To help you deliver your message to your target audience with detailed analytics, storage space to name a few features to help you focus on producing great content.
Over 658 Podcasters from all walks of life as chimed in to share the service providers they are having a great experience with.
Things You Need to Start Podcasting
There are some basic things you need to start a professional podcast. Let’s start the post with a list of the essential things for a podcast.
- Domain and WordPress: First things first, you need to create a website to publish your podcasts. If you already have WordPress installed on your website, you can skip this. Otherwise, choose a suitable domain name for your website. Get a good WP hosting – we suggest Siteground which hosts your website for as little as $3.95 to install WordPress on your domain. You want to be sure to get a great theme designed specifically for podcasters.
- Media Hosting Service: If you are serious about podcasting, you should invest in a separate media hosting account for your podcast. Storing large podcasts files on your regular hosting could slow down your website. Choose a media hosting like Blubrry which is specially optimized for publishing podcasts. Along with the top-class CDN, Blubrry also has a helpful community, built-in ID3 tagging, and iTunes optimization.
- Podcasting Equipment: You need some specialized equipment for professional podcasting. Getting a high-quality microphone should be your priority here. The built-in microphone of your computer or mobile phone will produce a poor sound quality. Instead, get a professional tool like the Rode Podcaster microphone.
- A computer and mixer (if using multiple inputs)
- A webcam/camcorder (if video podcasting)
PRO tip: You can
get a WordPress podcast theme for an audio first website.
Now that you have everything you need to get started, let’s start the actual process.
How Podcasting Works
With Itunes and other directories like Stitcher and Google Play, you set up your show and create a feed. Then every time you create a new show, a new show gets inserted into that feed. Which is then automatically picked up by Itunes and the other directories you have setup.
I mentioned this now because I sometimes get asked if you have to manually upload your show to Itunes.
Getting Used to Podcasting
Before you start publishing the podcasts on your website, you need to do some practice. Once you are confident about the whole process, only then you should start publishing the podcasts.
You need to use audio recording software to record and audit the podcast files.
Audacity is a popular choice for these purposes. This open-source, very powerful tool allows you to create studio-quality podcasts without having a real-life studio.
Being a robust, feature-rich tool, it is out of the scope of this article to cover all the features of Audacity. Luckily, the Audacity team has published
an in-depth tutorial about using the software for publishing podcasts. Follow the steps described in the tutorial, and you are all set.
You should save your podcasts as MP3 files. While saving the files, you need to follow a strict naming convention. Since podcasts are supposed to be continuous episodes, it would be wise to add a serial number to the file name.
Determine your podcast topic, niche & avatar
Here are a few questions you need to answer:
- Think about who is your show for?
- What is it about?
- Why do now?
- What pain is your show solving? What are the transformational benefits your listeners will receive?
- What’s the name of your Podcast Title?
- Research what’s already on market in your niche.
Podcast Artwork requirement
Image Requirements:
- 1400 * 1400 pixels(minimum) 3000 * 3000 pixels(maximum)
- 72 dpi
- PNG or JPG
- Compressed the file size (https://compressor.io/)
- Ensure your image looks good smaller
Extra resources for your artwork:
fiverr.com, upwork.com, canva.com(do it yourself)
Recording and Editing Your Show
In this section, we will talk about the equipment and software you will need to get your podcast off the ground. It’s important to note that you can have the best content in the world or most useful information but not of that matters if you have poor quality audio.
Purchase your equipment
Mic
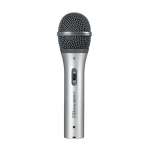 ATR 2100
 – (USB) – Entry-level Microphone, you will need Arm clamp and pop filter.
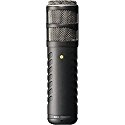 Rode Podcaster
 (XLR connection) – The mic that we use for podcasts and videos, please note you will need an XLR cable, mixer, Arm clamp, and pop filter.
 Heil PR-40
 (XLR connection) – This is what the Pro’s use, you will need an XLR cable, mixer, Arm clamp, and pop filter.
Mixer (optional depending on the mic)
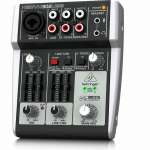 BEHRINGER XENYX 302USB
 – This is what I use cheap and cheerful, you can choose whichever mixer you want it doesn’t really matter. If you want to connect everything to your Computer or Laptop I suggest getting a USB mixer.
Pop Filter
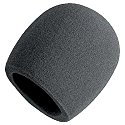 On Stage Foam Ball-Type Mic Windscreen, Black
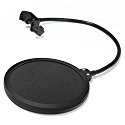 InnoGear Microphone Pop filter Mic Pop Shield
Arm Clamp
 Boom Scissor Arm
Shock mount
 Shock Mount Holder Clip Anti Vibration Suspension
Cable
 XLR Male to Female Microphone Cable
What Software for recording your podcast
Whether you are recording an interview over Skype or directly to your computer you are going to need some form of software to store that recording. So here’s what I recommend:
If you are using
Skype with
eCamm Call Recorder (Mac) or
Pamela(PC) for your interview recordings, and
Adobe Audition for your editing software.
If you’re not ready to pay for your editing software quite yet, then there are great free editing software programs, too like
GarageBand for Mac and
Audacity for PC or Mac.
Tag your mp3 (
http://www.pa-software.com/id3editor/)
Pro Recording Tips
- Create an outline for your show.
- Mic distances (test, test, and test)
- Face the mic at all times
- Mute mobile phone/notification
- Keep your ideal avatar in mind and the transformational benefits of the show.
- Just be yourself
- Umms – every master doesn’t start out perfect it will improve
- Don’t worry about being too perfect
- Show intro, the first impression counts. Use the PPP Formula (Source: Brian Dean https://www.youtube.com/watch?v=aJFK9k5i1ew)– Preview – tell them what to expect.– Proof – accomplished, experienced or researched– Preview – reiterate what your show is about
Uploading the Podcast Files
At this point, you have recorded some dummy podcast sessions. Now you are confident about recording podcasts and performing the necessary edits. The next step is to publish the podcasts on your website. However, you need to upload the podcast files first.
Since you are using Blurbrry for storing your podcasts files, you should use the
Blurbrry PowerPress Podcasting plugin on your website. You have to provide your Blurbrry account details to use the plugin. This plugin will help you add dedicated post type and taxonomies for your podcast, add HTML5 media players on your website, import podcasts, and follow the podcast SEO best practices.
When uploading your podcast files to Blurbrry, make sure that you are adding them from the Podcaster dashboard. Doing this will make sure that you can access the podcasts files from your website through the plugin.
Publishing the Podcast
So far, you have recorded the podcast sessions and uploaded these to your media hosting account. Now, it is time to publish the podcasts on your website.
While there are various plugins for showing podcasts on your website, we recommend Pat Flynn’s
Smart Podcast Player. Unlike the boring, traditional podcast players, this modern podcast player provides an excellent user experience for the visitors.
This plugin comes with a beautiful podcast player that allows the visitors to play, pause, set play speed, share, and download podcasts from the same page. The player also shows your podcast library on the sidebar.
Smart Podcast Player allows you to add two types of players – the default player and a track player. You will find dedicated icons in the post editor to add both of these players. You need to use the track player for single episodes, and the default player for displaying the podcast player anywhere else you want.
When it comes to customizations, the plugin offers several choices to match the player with your existing design. You can choose the light or dark skin, choose custom colors, set the default sorting mode, provide social sharing buttons, and keep track of the downloads.
There is a built-in mobile player on Smart Podcast Player. That means your podcasts will be perfectly accessible on mobile and tablet devices as well.
Working with iTunes
If you have made it this far, you can congratulate yourself for publishing a brand new podcast. There is only one thing left for your podcast. And that is to submit the podcast to iTunes. iTunes is the biggest directory of podcasts, and you will have a better chance of getting noticed by listing yourself.
Before you submit your podcast to iTunes, you need to make sure that everything is in order. To do that, install iTunes on your computer, open the software, and log in to your iTunes account.
Next, go to File > Subscribe to Podcast, and provide the feed URL of your podcast. You need to make sure that the artwork, description, category, episode, etc. are properly displayed. If everything looks good, click the ‘Submit’ button. Check out
this Blurbrry tutorial for a step-by-step guide to the process.
And that’s how you create a podcast, publish it to your website, and submit to iTunes.
Promote it!
Long gone are the days when you only put out content in one format. that is why it’s ever so important to repurpose your content as your audience will most likely have a different preference. So you could publish a blog post and simply attach your episode with or without a transcript.
Share it on social media this day you can use tools like Buffer, Hootsuite, Dlvr.it and many more.
The key is to get creative.
3 ways to master Itunes.
- The number of subscriptions you have.
- Total episode download
- Total rating and reviews in a short period.
Pro tip: launch with a minimum of three episodes
on day one.
Additional Resources
Congregations on making it this far but the learning doesn’t stop there. If you want to become a master of your craft it’s time to start investing more in yourself. Here a few notable courses and resources by Podcasting gurus:
Power UP Podcasting by Pat Flynn
Podcasters’ Paradise by John-lee Dumas
The top 8 ways to monetize by Podcasting by John-lee Dumas
Side note: you can continue to read a zillion blog on podcasting, the thing is the information is usually incomplete save yourself time and invest in a course where everything is compact.
Over users have rated and voted on 9 of the best solutions Podcast Hosting Services available in 2024, put them through a stringent series of examinations with the help of 658 voters like you, and assigned them FindrScores, all to help you make a smarter decision.
Our algorithm looks at over 1215 such as user satisfaction, price, geographical quirks, how the must-have functionality like Podcast RSS Feed, Audio Hosting, 99.9% Uptime compare against these 9 solutions.
So whether you’re looking for the cheapest, easiest to use, the best overall we ‘ve got you covered.
Narrow down your search
Find the best Podcast Hosting Service for you, Tailor the data to find the best Podcast Hosting Service for your needs. See which software offers the best Podcast RSS Feed, Audio Hosting, 99.9% Uptime or which is the easiest to use.
Filter by top Podcast Hosting Services in United Kingdom – See what users from this country recommends
Filter by Podcast Hosting Services in India – See what users from this country recommends
Filter by free Podcast Hosting Services – See which is the best free solution.
Filter by cheapest Podcast Hosting Services – See which is the most affordable solution.
Looking for Hosting deals? – See today’s best Hosting discount codes.

 ATR 2100 – (USB) – Entry-level Microphone, you will need Arm clamp and pop filter.
 Rode Podcaster (XLR connection) – The mic that we use for podcasts and videos, please note you will need an XLR cable, mixer, Arm clamp, and pop filter.
 Heil PR-40 (XLR connection) – This is what the Pro’s use, you will need an XLR cable, mixer, Arm clamp, and pop filter.
Mixer (optional depending on the mic)
 BEHRINGER XENYX 302USB – This is what I use cheap and cheerful, you can choose whichever mixer you want it doesn’t really matter. If you want to connect everything to your Computer or Laptop I suggest getting a USB mixer.
Pop Filter
 On Stage Foam Ball-Type Mic Windscreen, Black
 InnoGear Microphone Pop filter Mic Pop Shield
 Shock Mount Holder Clip Anti Vibration Suspension
 XLR Male to Female Microphone Cable